

Info Hub
DIY Narrow Hallway Bench with Shoe Storage Plans — Space‑Saving Build
Why a Narrow Hallway Bench with Shoe Storage Is the Perfect Space‑Saving Solution
Living in small UK homes or flats means narrow hallways, cluttered shoes and nowhere to sit. A purpose‑built narrow entryway bench with shoe storage keeps the floor tidy, provides a quick seat for lacing boots and uses vertical space efficiently. It’s stylish, practical and compact.
Find clear DIY plans, measured guidance and space‑saving tips for UK readers. We cover cut lists, tools, joinery and compact shoe solutions — cubbies, slatted shelves and pull‑outs. Use long tail keywords like “DIY narrow hallway bench with shoe storage plans UK” for small hallways in flats. Choose a feature image (1200×800px).

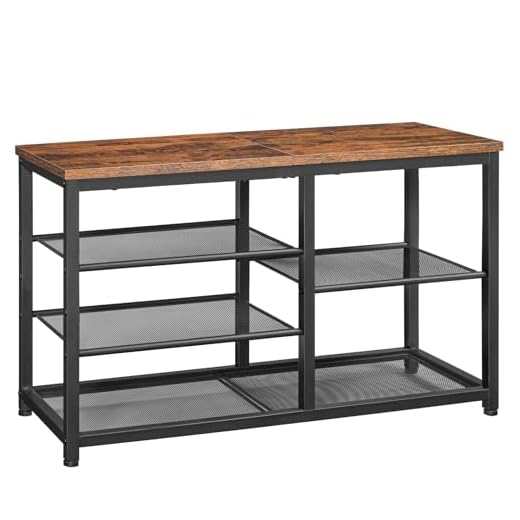
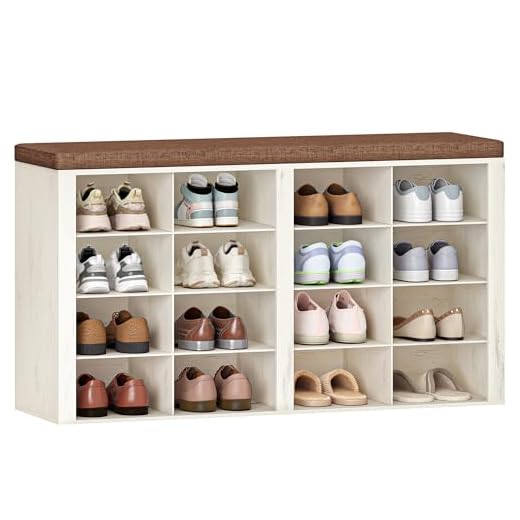

Designing for Tight Spaces: Measurements, Clearances and Style Choices
Measure like a pro: clear width, door swing and circulation path
Take real measurements before planning. Note the clear width of the hall (wall‑to‑wall), the swing of any nearby doors and the most used circulation path. In many UK terraces and flats hall widths range from 700–1,200mm; aim to keep a clear walking route of at least 760–900mm so the bench doesn’t bottleneck traffic. Don’t forget coat doors, cupboard doors or a front‑door swing — mark them on the floor with tape to visualise conflicts.
Bench depth and seat height that work in UK homes
Choose a slim profile:
Style choices for period and modern properties
Match style to your home: minimalist slatted benches suit modern flats; shaker‑style with simple mouldings complements Victorian and Edwardian halls; a built‑in look (frame the bench into a niche) reads bespoke in older properties; a freestanding slim console bench works in rental flats. For product inspiration, check compact models like the IKEA HEMNES bench or narrow console ranges from Habitat.
Colour, finish and vertical storage to preserve sightlines
Use light colours or a semi‑gloss on lower trims to reflect light in narrow corridors. Stained timber or muted greys work well with both period and contemporary schemes. Preserve sightlines: prefer open slatted shelves or shallow cubbies over bulky closed cupboards. Vertical slim cabinets or stacked cubbies take advantage of height without narrowing the path — ideal if you’re wondering how to make a slim hallway bench with shoe rack for small UK homes.
Plans and Materials: Cut List, Tools and Choosing the Right Supplies
Practical plans make a weekend build achievable — this section gives a compact cut list, full materials and tools so you can start building your DIY narrow hallway bench with shoe storage plans UK without hunting for specs.
Suggested cut list (for a 1200mm long x 300mm deep slim bench)
Materials & timber options
Suggest eco options: reclaimed timber, FSC‑certified plywood, or second‑hand carcasses from salvage yards.
Tools & safety kit
UK procurement tips: buy timber and fittings at Wickes, B&Q, Jewson, or Selco for trade prices; Screwfix for tools; Timbmet or The Reclaimed Timber Company for specialty boards. For tighter budgets, use 18mm MDF with veneered edge or shop-local offcuts; for greener builds, hunt FSC plywood or reclaimed planks at local salvage yards.
Feature image guidance: choose a bright, well‑styled hero image 1600 x 1067 px (3:2 ratio) in JPEG or WebP; alt text: “Slim wooden hallway bench with shoe cubbies in small UK entryway”.
Step‑by‑Step Build: Cutting, Assembly and Joinery for a Slim Bench
Prep & cutting
Start by transferring the cut list to timber and batch‑cut identical parts. Mark every piece with a unique number and arrow for grain direction. For accurate straight cuts in a small flat, a track saw like the Festool TS 55 or Makita SP6000 makes life easier; for budget builds a circular saw with a straightedge works fine. Label and stack parts to avoid mistakes.
Dry‑fit & mock‑up
Dry‑assemble the frame on sawhorses to check fit and clearances. This is the stage to confirm your measurements for “how to build a narrow entryway bench with shoe rack” or run through a “DIY slim hallway bench step by step UK” checklist. Try placing it in the hallway with cardboard templates if possible.
Assembly order & recommended joinery
Assemble in this order:
Use pocket screws for quick, strong corner assembly (Kreg jig), dowels where visible edges must be clean, and butt joints reinforced with biscuits for long edges. Glue all joints with PVA and clamp overnight for max strength.
Working in a small workshop or flat
Batch similar cuts, drill all pocket holes at once and use sacrificial boards under clamps to protect floors. Use long Bessey clamps and a few 6mm plywood sawhorses to support large panels. Transport by carrying smaller sub‑assemblies rather than a finished bench — it’s easier to manoeuvre through narrow stairwells.
Safety & finishing checks
Wear FFP2 dust mask, goggles and ear protection during cutting. Sand progressively (120 → 180 grit), fill visible defects, and perform a test weight: aim to support 150–200kg to be safe for two adults. Final check: square corners, level seat, and smooth edges before finish.
Shoe Storage Solutions Built Into the Bench: Cubby, Slatted Shelves and Pull‑Out Options
Shallow cubbies — neat, tidy and quick to build
For a slim profile, design cubbies with an internal depth of 28–32 cm and an internal width of 24–30 cm per pair; this suits UK adult shoes up to size 11–12 (≈30–31 cm). Vertical height of 10–13 cm works for trainers; fit one taller bay (30–40 cm) for occasional boots. Use adjustable plywood dividers so spacing can change as needs evolve.
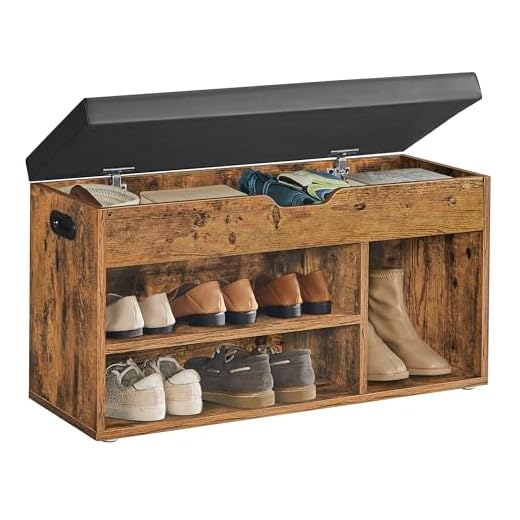
Angled slatted shelves — ventilation and easy viewing
Angle slatted shelves downwards at 10–15° so toes point slightly forward; set slat spacing at 8–12 mm for ventilation. Make shelf depth 30–35 cm to accommodate trainers and bulkier soles. Slats reduce odours and speed drying after wet days—ideal for a space‑saving entryway bench with shoe storage for small hallways.
Pull‑out trays & low drawers — concealed, accessible storage
Low drawers with internal heights of 10–14 cm work for most shoes; deeper pull‑outs (20–30 cm) are necessary for mid‑calf boots. Use full‑extension soft‑close runners (eg. Blumotion) for smooth access. Pull‑outs let you increase capacity without widening seat depth—handy in narrow hallway shoe storage bench plans UK.
Removable baskets & quick‑tidy solutions
Wire or rattan baskets on shallow shelves provide grab‑and‑go flexibility. Choose washable liners and label baskets for family organisation (kids’ shoes, sports, wet gear).
Balancing capacity with narrow seat depth
If seat depth is limited (28–33 cm), prefer vertical solutions: double tier staggered depth (front row shallow, rear row deeper) or a mix of cubbies and pull‑outs to maximise pairs without expanding footprint.
Ventilation, cleaning & accessibility
Include perforated backs, removable slatted trays and wipeable surfaces for easy cleaning. For less mobile users, keep at least one storage bay at 300–450 mm seat height with large pull‑handles or recess grips for effortless reach.
Next up: finishes, upholstery choices and durable fabrics to make the bench both comfortable and long‑lasting.
Finishes, Upholstery and Cushions: Durable Looks for High‑Traffic Hallways
Choose the right finish for busy UK entryways
For a hall that sees kids, dogs and wet umbrellas, pick finishes that resist scuffs and moisture. For painted benches, use trade‑quality eggshell or satin (eg. Dulux Trade Quick Dry Eggshell or Johnstone’s Trade Durable Eggshell) over a good primer (Zinsser or BIN for knotty timber). For timber tops choose hardwearing varnishes or oils—water‑based polyurethane for low odour, oil‑based for deeper colour and abrasion resistance. Coastal or damp areas benefit from marine spar varnish (International Yacht Varnish) or highly moisture‑resistant oils.

Durable finishes for space‑saving hallway furniture — quick tips
Fabrics and foam: comfort without eating into depth
For “DIY narrow hallway bench seat cushion ideas UK” pick performance fabrics: Sunbrella (UV/moisture resistant), Crypton or Scotchgard‑treated cotton blends. Vinyl or wipeable coated fabrics are brilliant for muddy shoes and children. Choose mid‑tone colours or textured weaves and small-scale patterns to hide marks.
Recommended foam:
How to fit an upholstered seat (two ways)
- Removable cover: cut plywood base to seat size, glue foam with spray adhesive, wrap in polyester batting and fit a zipped fabric cover sewn slightly oversized. Attach with Velcro strips under the seat for easy washing.
- Simple glued cushion: glue foam directly to plywood with contact adhesive (Bostik Evo‑Stik), wrap with batting and staple fabric to underside for a permanent, tidy finish.
Choose a feature image at 1200×800px showing a finished slim bench in a real hallway to illustrate colour and scale.
Installation, Safety and Practical Tips to Maximise Hallway Space
Installing and anchoring by wall type
Always use a spirit level, measure twice and avoid drilling where pipes/cables run—use a cable detector before you drill.
Safety checks & maintenance
Practical, space‑saving organisation
Troubleshooting quick fixes
Customise further with painted trims, a built‑in coat peg rail, or an integrated umbrella slot to make your narrow bench uniquely yours and move on to final touches in the Conclusion.
Ready to Build: Transform Your Narrow Hallway into an Organised Space
A DIY narrow entryway bench with shoe storage is a smart, space-saving solution for UK homes — tidier, practical and tailored to tight hallways. Follow the plans, adapt dimensions and finishes to suit your layout and style, and apply the practical tips on joinery, cushioning and installation to ensure lasting results. Include a high-quality feature image (1200×800px) to showcase your design.
Start your DIY narrow hallway bench with shoe storage plans today: measure carefully, choose durable materials and enjoy a neater, more welcoming entryway. Share photos and tips with fellow UK DIYers to inspire smarter small‑space storage solutions today too.