

Tips & Tricks
How to Repair Common Issues with Space-Saving Furniture
Unlocking the Secrets of Space-Saving Furniture Repair
Discover the essential techniques to tackle the most COMMON ISSUES with space-saving furniture. With our step-by-step guide, you’ll learn how to EXTEND the life of your favourite pieces and maintain their FUNCTIONALITY for years to come. Let’s dive into the world of furniture repair!
What You’ll Need to Get Started

Identify the Problem: Diagnosis is Key
Is that squeak a sign of something sinister?Pinpoint the specific issue affecting your space-saving furniture. Inspect each piece thoroughly to understand what’s wrong.
By accurately diagnosing the problem, you’ll set yourself up for effective solutions, ensuring your repairs aren’t just band-aid fixes but long-lasting improvements.

Gather Your Tools: Don’t Start Without Them!
A well-stocked toolkit can save the day!Assemble your toolkit before embarking on any repair project. Having the right tools not only speeds up the process but also ensures effective fixes.
Keep these tools within reach for a seamless experience, allowing you to tackle repairs confidently and efficiently!

Fixing Loose Joints: A Solid Foundation
Could wobbly furniture be a thing of the past?Reinforce the structure of your furniture by addressing loose joints. Start by applying wood glue to the affected area. Disassemble the joint if necessary, apply glue generously, then clamp it together until dry.
For added strength, consider using corner brackets. Position them inside the joint, fastening with screws to create a robust connection that prevents future wobbling.
In cases of structural screws, tighten any existing screws and replace missing ones. For example, with a wobbly chair leg, examine where the leg meets the seat, and ensure all screws are tightened properly.
By fortifying these connections, your furniture will gain renewed stability, making it ready to withstand daily use and adding years to its longevity.

Restoring Drawers: Smooth Moves Ahead!
Are your drawers nightmares of frustration?Breathe new life into jammed or sticking drawers with a few simple techniques. Start by aligning the drawer with its tracks. Remove the drawer completely, check for alignment, and adjust if necessary. Ensure the tracks are straight and secure.
Lubricate the slides: Apply a small amount of furniture wax or silicone spray to the metal tracks or wooden guides. Slide the drawer back in and test its movement; it should glide smoothly now.
Replace damaged slides if alignment and lubrication don’t resolve the issue. Unscrew the old slides and secure new ones, ensuring they’re level with the existing track.
For instance, if a kitchen drawer is sticking, take a moment to clean the track and lubricate it properly—you’ll be amazed at the difference smooth-opening drawers can make in your daily routine!

Repairing Upholstery: A Touch of TLC
Can a little fabric magic save your sofa?Revitalise worn-out upholstery by employing sewing techniques or patching to restore its former glory. Start by assessing the damage; small rips or tears can often be mended with simple sewing.
Sew up small tears using a needle and thread. Match the colour of the fabric to ensure a discreet repair. For example, if a cushion cover has a small hole, carefully stitch it, using a whip stitch for a neat finish.
For larger damage, employ patches. Cut a piece of fabric—preferably from an inconspicuous area of the furniture or a matching material. Secure it over the damaged area with a staple gun or fabric glue.
Lastly, fluff and clean the upholstery to refresh its appearance. Your furniture will not only look appealing but also enhance your living space while saving money!
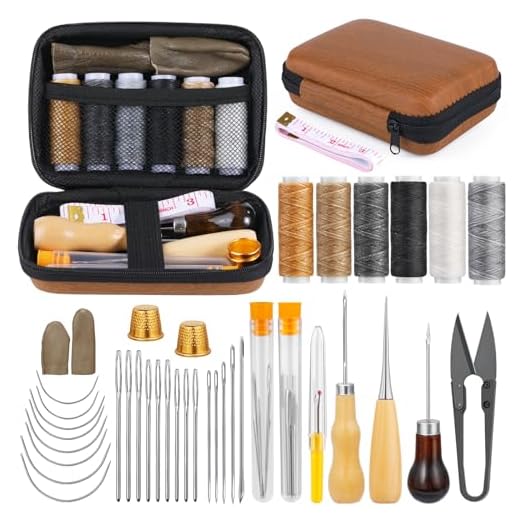
Finishing Touches: Make It Like New Again!
Ready to transform the look of your furniture?Rejuvenate your furniture with polish, paint, or stain to enhance its appearance and protect its surfaces. Start by cleaning the item thoroughly, removing any dust and grime; this will ensure the finish adheres properly.
Apply wood polish for a lustrous shine. Use a soft cloth, rubbing the polish in circular motions, focusing on high-contact areas like tabletops or chair arms.
For a fresh look, consider painting or staining. Choose a high-quality product that suits your furniture’s material and style. For instance, a light stain can brighten a dark wood piece, while a bold paint colour can create a statement piece in any room.
Finally, allow the finish to cure fully according to the manufacturer’s instructions. With these finishing touches, your space-saving furniture will not only look rejuvenated but also last longer!

Your Furniture is Ready for Action!
Armed with these repair skills, you can confidently restore your furniture and keep it looking great. Try out these fixes and share your results! Your space-saving pieces deserve to shine. Happy repairing!
I’m more of a ‘call the professional’ type, but even I found some good tips here. 😂 Maybe this is my sign to start DIY-ing! Just need to convince my husband now!
Start with small projects, Olivia! You’d be surprised at what you can accomplish!
Exactly! Once you fix something, you’ll get addicted to the DIY life!
Just finished fixing my old chair! 🌟 The loose joints were a pretty simple fix. Thanks for the step-by-step breakdown. My next step is definitely upholstery repair because let’s face it, it’s a bit sad looking now.
Thanks, Samantha! Would love any tips you could share.
Awesome to hear, Michael! Upholstery repair can really bring new life to furniture. Good luck!
Nice job! If you need tips on upholstery, just shout out! I’ve done a few DIY projects myself.
Love how detailed this guide is! I usually just wing it with furniture repair, but I feel like I can actually do this correctly now! 💪 Can’t wait to get started this weekend. Any recommendations for tools?
A level is a game changer for sure! Don’t forget that.
Definitely a must-have is a good wood glue and a screwdriver set! You’ll be all set.
One problem I have is a drawer that gets stuck. Anyone else experienced this? I’d love some advice!
Yes! You might just need to adjust the runners or add some wax—trust me, it works wonders!
Great tip, Ryan! Sometimes all it needs is a little TLC.
Got my tools ready, but I feel like I’m missing some essential ones. Can someone list what’s absolutely necessary?
Basic toolkit includes a hammer, screwdrivers, wood glue, and a level. You’ll be all set to tackle most repairs!
Definitely a measuring tape too! Make sure you have that.
Wow, this guide is a lifesaver! I didn’t even realize how many little fixes I could do myself. 🤯 My coffee table has been wobbly for ages, but I’m ready to tackle it now. Can’t wait to get into the tools section!
Good luck with that! I had the same issue with my table, and it was actually easier than I expected.
So glad you found it helpful, Emily! Wobbling tables can be super annoying. Let us know how your fix goes!
This article is great, but what about those pesky scratches? They drive me nuts! 😩
I just use a bit of old furniture polish. It works wonders!
Got you covered, Chris! We might do a follow-up on dealing with scratches—thanks for the suggestion!
Identifying the problem is definitely the hardest part for me. I always think it’s one thing but it turns out to be something else! 😩 Anyone have tips for how to diagnose issues without taking everything apart?
I feel you! I’ve done that before. Maybe just try slowly moving things or testing if it’s wobbly from certain angles? That helped me.
Great suggestion, John! Paying attention to how your furniture feels when using it can help pinpoint the issue without disassembly.
Just completed the whole guide and now my furniture looks brand new! 🙌 Thanks a ton! I really appreciated the upholstery section—so helpful. How do I maintain this after repair?
For maintenance, a regular clean and avoiding excess weight on your furniture goes a long way!
Plus a good furniture polish helps it last longer too!