

Info Hub
DIY Space‑Saving Loft Bed for Low Ceilings — Built‑in Storage Tips for UK Homes
Why a DIY Loft Bed Is a Smart Choice for Low‑Ceiling UK Homes
Thinking small? A DIY loft bed is a brilliant way to free floor space and create built‑in storage in tight rooms. This guide shows practical, budget‑friendly approaches to how to install a loft bed with built-in storage in a low-ceiling room and explains simple planning and safety steps. Ideal for anyone searching “DIY loft bed for low ceilings UK”.
You’ll learn design options for a space-saving loft bed with drawers for small UK rooms, plus tools, costs and step‑by‑step installation tips. Recommend a high‑quality feature image: low‑ceiling loft bed with integrated drawers and shelving in a compact UK bedroom; suggested size 1200 x 800 px (landscape) for web use today.



Measure, Plan and Check Regulations Before You Start
Accurate measuring: what to record first
Start with a room survey. Measure floor‑to‑ceiling height in at least three places (centre and either end) — low ceilings can slope. Measure window head height, radiators, door swings and the route a mattress will take into the room. For access: measure clear walkway width and vertical clearance for a ladder or steep stair.
How to calculate maximum loft height
Decide desired headroom above the mattress: aim for at least 600–750mm of clear headroom above your mattress for sitting up comfortably. Then subtract mattress depth and frame thickness from the available floor‑to‑ceiling height:Available loft height = ceiling height − required headroom − mattress depth − frame/joist thickness.
Example: 2.30m ceiling − 0.65m headroom − 0.20m mattress − 0.10m frame = 1.35m maximum loft platform height above floor.
Mattress depths matter: standard single mattresses range from about 120–300mm. A memory foam (200–250mm) will reduce headroom more than a thin sprung mattress. Platform frames or slatted bases add 50–150mm extra height compared with low‑profile frames.
Check building rules and when to get help
Search “building control advice for loft beds in UK homes” and contact your local authority for planning a loft bed for low ceiling rooms. If you’re attaching the bed to masonry walls, moving structural timber, or adding permanent stairs, building control may need to inspect. Get a structural engineer if load paths are unclear or you’re spanning large distances.
Practical site checks and sketch template
Note nearby pipes, wiring, outlets and whether a radiator will obstruct storage doors. Record measurements:
Simple side/top sketch:Side: Floor ──[platform height]── mattress + headroom ── ceilingTop: Wall A | platform width/depth | Ladder at corner or long side
With these measurements and your local checks done, you’ll be ready to choose the right low‑loft design in the next section.
Design Options for Low Ceilings: Low‑Platform, Mid‑Loft and Raised Beds
Low‑platform lofts (a few feet off the ground)
Low‑platform lofts sit 300–600mm above floor level. They sacrifice standing headroom but maximise usable storage underneath and feel less claustrophobic. Ideal for box rooms where building a tall frame would hit the ceiling. Think of an IKEA SLÄKT style base with deep drawers — you gain wardrobe and under‑bed storage while still being able to sit up in bed.
Mid‑lofts (usable workspace underneath)
Mid‑lofts raise the platform enough to create a functional zone beneath: desk, shallow cupboard, or wardrobe. Aim for 1.1–1.35m of platform height if you want a small seated workspace. Trade‑offs: you lose some headroom above the mattress but gain organised living space — a good compromise for student studios where a “loft bed with integrated wardrobe for small bedrooms UK” is a frequent search goal.
Raised beds (where ceiling permits)
If ceiling height allows (2.6m+), go higher for full standing clearance under the bed and larger built‑ins. These maximise storage capacity but require sturdier construction and sometimes building control involvement.
Built‑in storage configurations that work in low heights
Layout ideas by room type and orientation
Box rooms: place the platform along the long wall, ladder at the foot to keep door swing clear. Student studios: run the bed beside the window to create a light workspace underneath. Attic conversions: align the bed parallel to the roof slope, keeping the head near the lowest wall to maximise headroom above the usable zone. Quick sketch note: orient mattress so natural light grazes the side rather than the head — this improves morning light without glare and keeps circulation routes clear.
Materials, Tools and Cost‑Saving Tips for a Durable Build
Robust materials that save space and last
Use structural timbers for the frame (C24 or similar). Typical sizes that balance strength and clearance:
For a standard single (90 × 190cm) platform you’ll typically need:
Essential tools
Cost‑saving, practical tips
Where to buy loft bed materials UK? Look at national DIY chains, builders’ merchants (Travis Perkins, Jewson, Selco), online retailers (Screwfix, Wickes) and local reclamation yards for bargains. Practical sourcing now sets you up to assemble confidently in the next, step‑by‑step installation section.
Step‑By‑Step Installation for a Loft Bed in a Low‑Ceiling Room
1) Prepare the room & mark the footprint (30–60 mins)
Clear the room, remove skirting where needed and protect the floor. Measure twice: final head‑height above mattress should be comfortable when sitting. Mark the bed footprint on the floor and transfer critical heights to walls. This is the starting point for “how to install a loft bed with built‑in storage in a low‑ceiling room UK”.
2) Construct the base frame and reinforce joinery (2–4 hours)
Build the frame flat on the floor using 47×150mm rails and 47×100mm joists; use M8 coach bolts and steel angle brackets at every major joint in addition to glue and screws. Dry‑fit first, then assemble. Pre‑drill and countersink to avoid splitting. Pre‑assembling the frame reduces awkward overhead work.
3) Install vertical supports and check level/plumb (1–2 hours)
Raise the frame onto temporary supports, clamp, then install permanent posts or wall cleats. Use a long spirit level and laser to check level and plumb. If attaching to studwork, use through‑bolts into studs; for masonry, use chemical anchors or heavy‑duty sleeve anchors.
4) Fit ladder or compact staircase (1–2 hours)
Choose the best access for the room: compact alternating‑tread stairs (good for small footprints) or a pull‑down loft ladder (Fakro‑style) if space is very tight. Secure treads with bolts and test with weight before finishing. Consider a hinged ladder that folds flush to save space.
5) Build & install built‑in drawers, shelves and shallow wardrobes (2–5 hours)
Construct drawer carcasses on the floor, fit 300mm heavy‑duty ball‑bearing runners, then slide into place. For shallow wardrobes, use 300–350mm depth to keep circulation under the bed. Bolt shelving carcases to the base frame; never rely on screws alone for load‑bearing fixings.
6) Add sleep surface, mattress & guardrails (1–2 hours)
Fit 18mm ply deck, secure with countersunk screws into joists and brackets below. Install guardrails at least 38cm above mattress top. Place mattress and test clearance; final tighten all fixings.
Practical tips & lifting techniques
Use panel lifters or lifting straps and two people for heavy ply. Pre‑assemble drawers and stair treads on the floor to avoid working at height. Dry‑fit everything before final glue.
Approximate total time
Expect 8–16 hours over 1–3 days for a competent DIYer using one helper — this is a practical “DIY loft bed installation guide for small bedrooms”.
Troubleshooting
Next you’ll want to ensure your build meets safety and legal requirements — see the Safety, Load‑Bearing Considerations and Compliance section.
Safety, Load‑Bearing Considerations and Compliance for UK Homes
Assessing walls and joists before you fix anything
Start with a reliable stud finder and a sound‑test (knock and listen) to locate timber studs; confirm with a 50–80mm pilot screw. For masonry, use a hammer drill and chemical anchors for a secure hold. Check floor joists by locating centre‑to‑centre spacing (commonly 400–600mm) and measure depth; shallow or undersized joists usually need a ledger, beam or extra support posts under the frame.
When to use hangers or support posts
Use galvanised joist hangers (Simpson Strong‑Tie or similar) where a beam meets a joist, and add a central steel or laminated timber beam with bearing posts if spans exceed 2.5–3m or if joists are undersized. Posts (M10 coach bolts into soleplates) transform cantilevers into fully supported loads.
Load calculations — static vs dynamic loads
Treat static loads (mattress, storage) separately from dynamic loads (people moving). Good DIY practice: calculate expected load, then design for 1.5×–2× that value. A common safe target for a single‑bed platform is a 500–600kg uniformly distributed load; for doubles aim higher. If unsure, overspec timber (e.g. 47×150mm rails) and add a central beam.
Fixings, brackets and fasteners
Use galvanised or stainless steel fixings:
Guards, ladders and treads
Fit guardrails at least 380mm above the mattress top; close gaps to prevent entrapment. Stairs: aim for a pitch of 30–42°; ladders 50–70°. Use non‑slip nosing or grit tape on treads and test access for easy evacuation.
Standards, fire safety & rental advice
Follow UK safety guidelines for loft beds and consult relevant standards (for example BS EN 747 for high beds, BS 6399/Eurocode for imposed loads) and check with local building control. Keep clearances from heaters, avoid combustible paints/veneers near radiators, and fit smoke detectors on the same floor. Renters: get written landlord permission and make fixings reversible (use wall cleats or battens) so the room can be returned to original condition.
Next, you’ll move on to finishing touches and organising the built‑in storage to make the space liveable and efficient.
Finishing Touches, Organising Built‑In Storage and Living With Your Loft Bed
Paint, finishes and optics
Choose light, neutral colours to visually expand the room—soft whites, warm greys or pale pastels. Paint the ceiling a shade lighter than the walls and use a satin or eggshell finish on trims to reflect light without glare. For timber surfaces, a hard‑wearing satin paint or Danish oil keeps grain visible but cleans easily. A thin vertical beadboard behind the headboard can add height visually without reducing actual clearance.
Hardware that saves height and smooths use
Pick recessed handles (Häfele flush pulls) and low‑profile soft‑close runners (Blumotion or Hettich Quadro) so drawers slide in without adding bulk. Use slimline euro‑hinges and concealed fixings to keep edges neat and prevent snags.
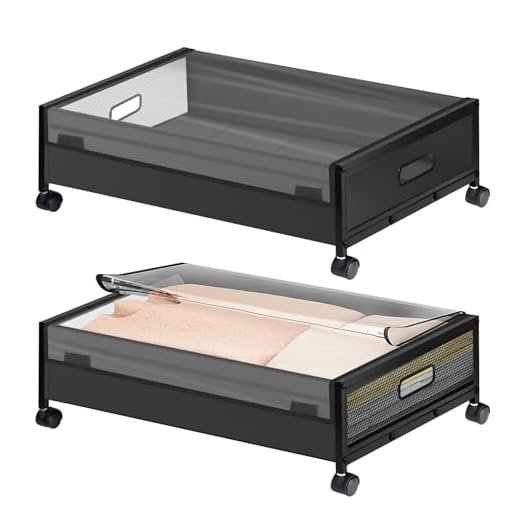
Practical storage layouts (how to design under‑bed storage for low ceilings)
Organisation tips and everyday hacks
Maintenance and future‑proofing
Check bolts and brackets every 6–12 months; lubricate runners with silicone spray; keep a pot of touch‑up paint for scuffs. Make units detachable with battens or bolt‑on brackets so the furniture can be uninstalled cleanly when you move.
Styling a compact space
Layer lighting (task LEDs, warm bedside lamp, strip under‑shelf), use a large wall mirror to double perceived space and choose multifunctional pieces (fold‑down desk, ottoman with storage) to complement your loft bed.
With these finishing touches and organisation tips in place, you’re ready to move to the Conclusion to start your project with confidence.
Start Your Space‑Saving Loft Bed Project with Confidence
Measure carefully, plan headroom and storage, and pick materials and fixtures suited to UK homes. Use the design options — low‑platform, mid‑loft or raised — that match ceiling height and lifestyle. Follow the safety checklist, load‑bearing guidance and building control rules.
Before you start, gather accurate room measurements and a materials list. If unsure, consult local building control. This DIY loft bed for low ceilings UK guide should help you plan, build safely and make the most of built‑in storage. Choose a high‑quality feature image sized around 1200×800px for sharing — ready now.